Creating a perfect print starts long before production. It begins with how you prepare your design file. Even a beautifully designed graphic won’t look right if the file isn’t set up correctly. Here’s a simple guide to help you get it right every time.
🔹 1. Use the correct print area dimensions
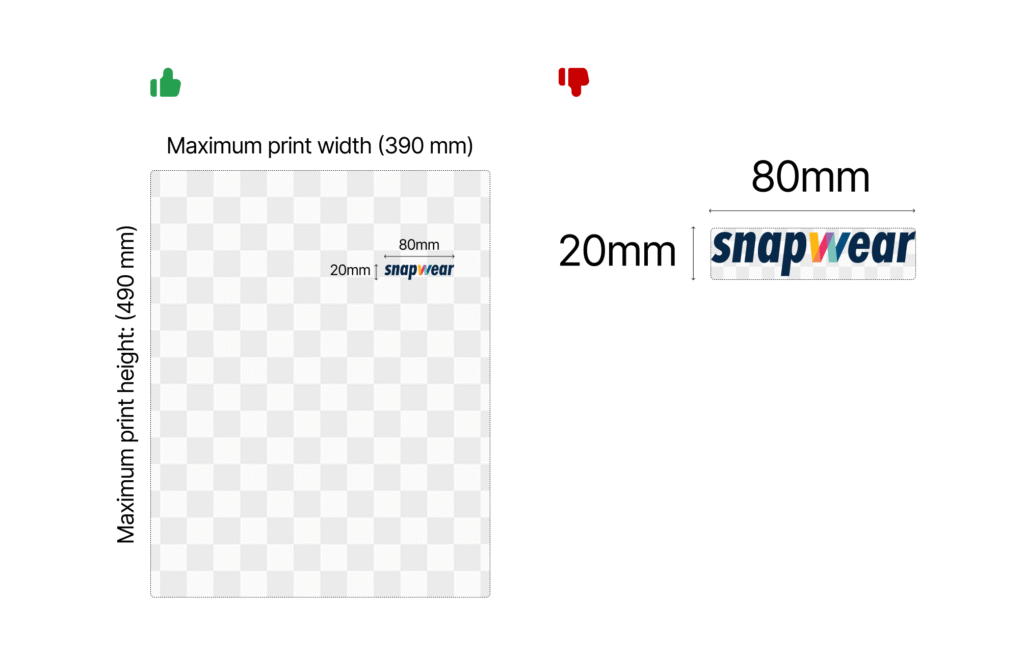
Each product in the Snapwear catalog has a defined maximum print area (for example, 390 × 490 mm for a T-shirt front).
Your design file should always match these dimensions — this ensures that your print will be properly scaled and positioned on the product.
🔹 2. Design in full print area at 1:1 scale
Even if your design is smaller, it still needs to be placed within the full print area of the product.
This means your canvas (artboard) should have the same size as the maximum printable area — not just the size of your artwork.
Example:
If the maximum print area of a T-shirt is 390 × 490 mm, and you want to place a small logo (e.g. 8 × 2 cm) on the left chest, create your file in 390 × 490 mm and position the logo in the correct spot. Don’t upload a separate 8 × 2 cm file — it must be placed inside the full print area to ensure accurate placement during production.
This method guarantees that the final print appears exactly where you want it on the product.
🔹 3. Keep the quality high
To make sure your print looks sharp and professional:
- Recommended resolution: 300 DPI
- Large-format designs (e.g. blankets, leggings) can use 120–150 DPI and still achieve excellent results.
- Lower resolutions might be sufficient depending on the product and design type, but always preview your file carefully before uploading.
🔹 4. Save your file as PNG with a transparent background
We recommend saving your design in PNG format because it supports transparency and high-quality color output. A transparent background prevents unwanted white or colored edges from appearing around your design. Avoid using JPEG files, as they compress your design and may cause visible quality loss, pixelation, or background artifacts. JPEGs are fine for mockups or previews, but not ideal for production.
🔹 5. Design in RGB color mode
While we accept files in various color spaces, our system performs all operations in RGB (Red, Green, Blue). If you upload a CMYK (Cyan, Magenta, Yellow, Black) file, it will be automatically converted to RGB, which may cause noticeable color shifts. To maintain accurate and vibrant colors in your print, always create and export your artwork in RGB color mode.
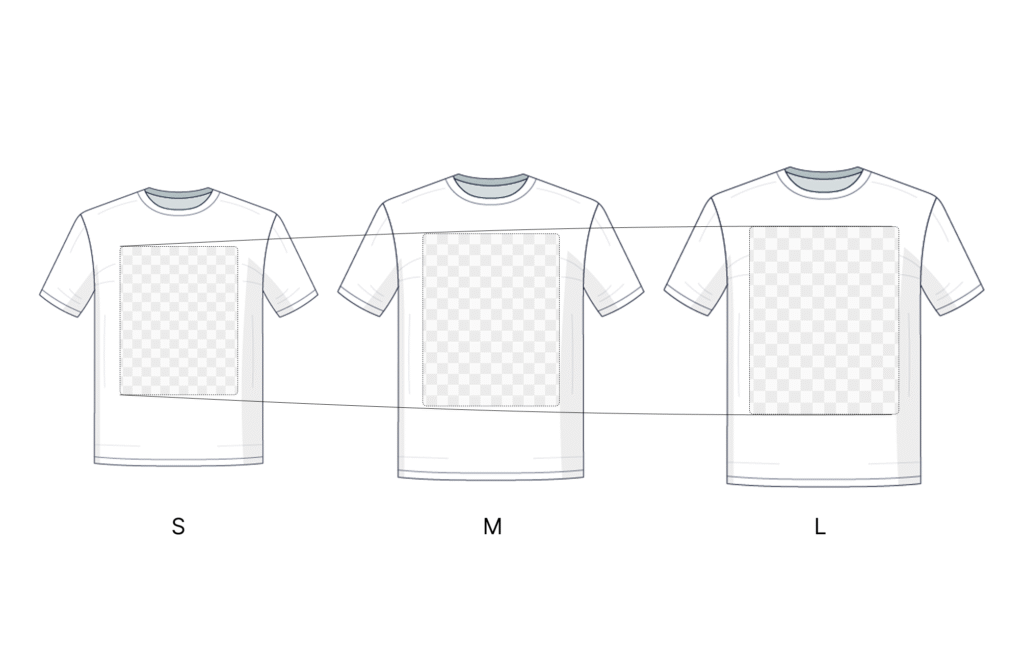
🔹 6. Keep in mind how your design scales across sizes
For all DTG and DTF products, the design is automatically scaled down for smaller apparel sizes to ensure consistent visual balance.
Preparing your file at 1:1 scale within the full print area might seem like a small detail, but it makes a big difference in print quality and accuracy.
With the right file setup — correct dimensions, resolution, color mode, and format — your final product will look just as you imagined it.
✅ A well-prepared file = a flawless print.